The Leave Transaction module allows employers to manage and track employees’ time-off activities, including leave applications, approvals, rejections, and cancellations.
All pending and completed leave actions can be reviewed directly from this page.
Steps to Preview Leave Transaction:
1. Go to E-Leave > Management.
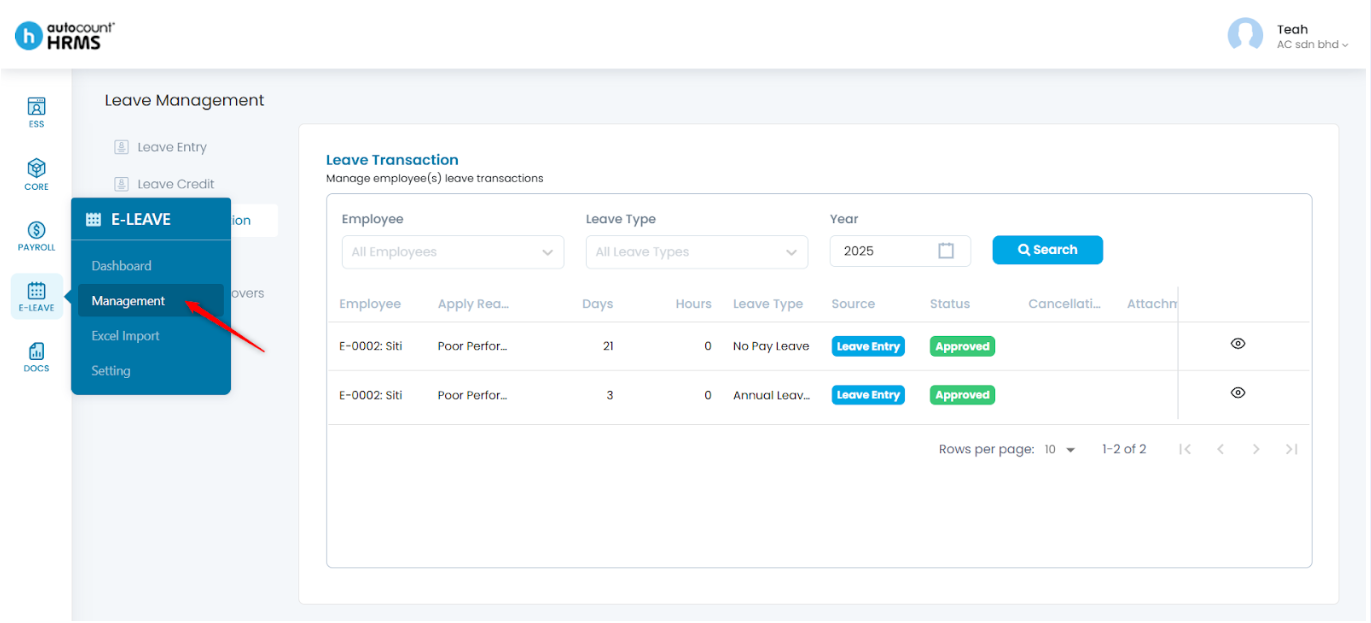
2. Under Leave Management, select Leave Transaction.

3. Filter by Employee, Leave Type, and/or Year as needed, then click Search.

4. You can now view the Leave Transaction records:
- The Source column indicates how the leave was recorded:
- E-Leave – The employee applied through ESS > My Leave.
- Import – The leave was uploaded via E-Leave > Excel Import.
- Leave Entry – The employer recorded or adjusted the leave on behalf of the employee via E-Leave > Leave Entry.
- The Status column shows whether the leave is Approved, Rejected, Pending, or Cancelled.

5. Click the eye icon to preview detailed leave information.


Steps to Approve a Leave Request:
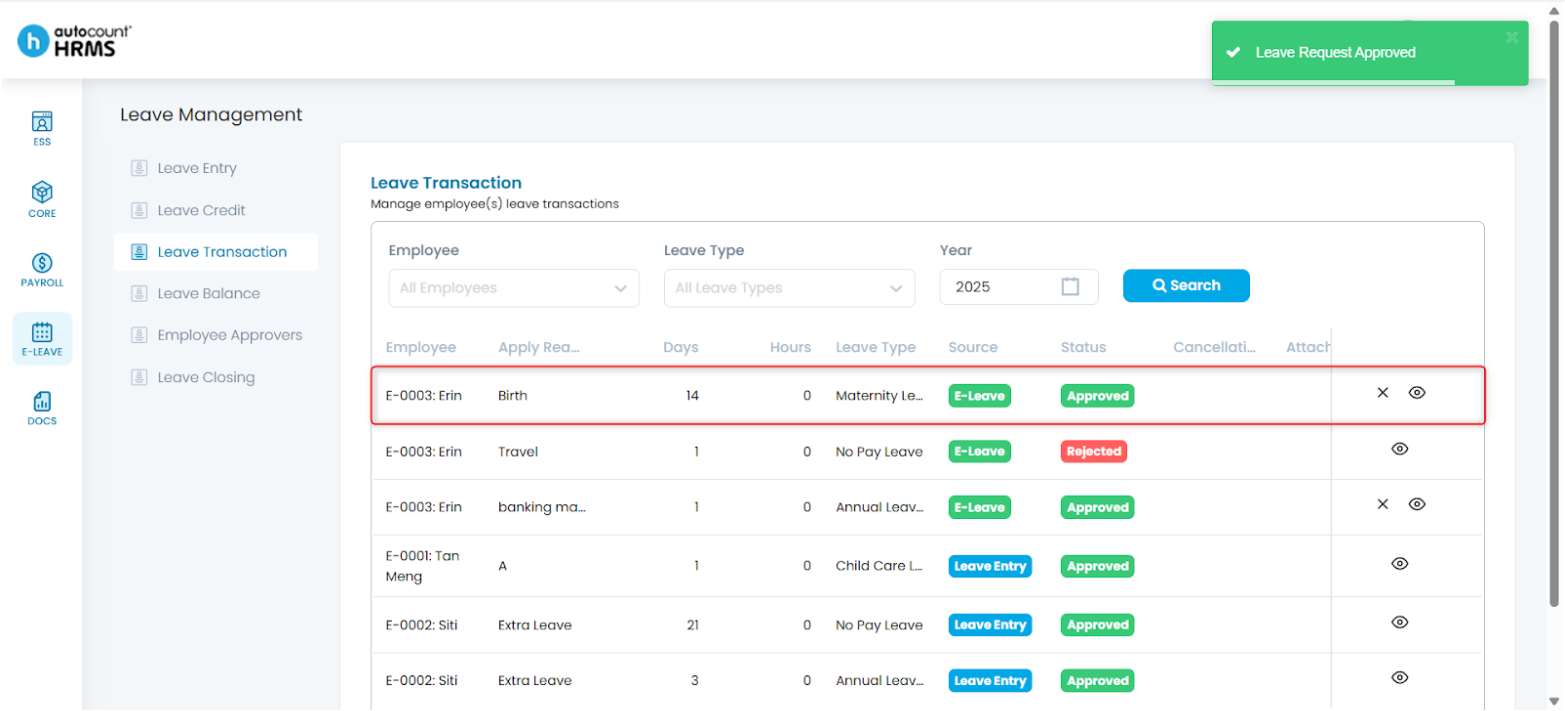
1. Click the Tick icon.
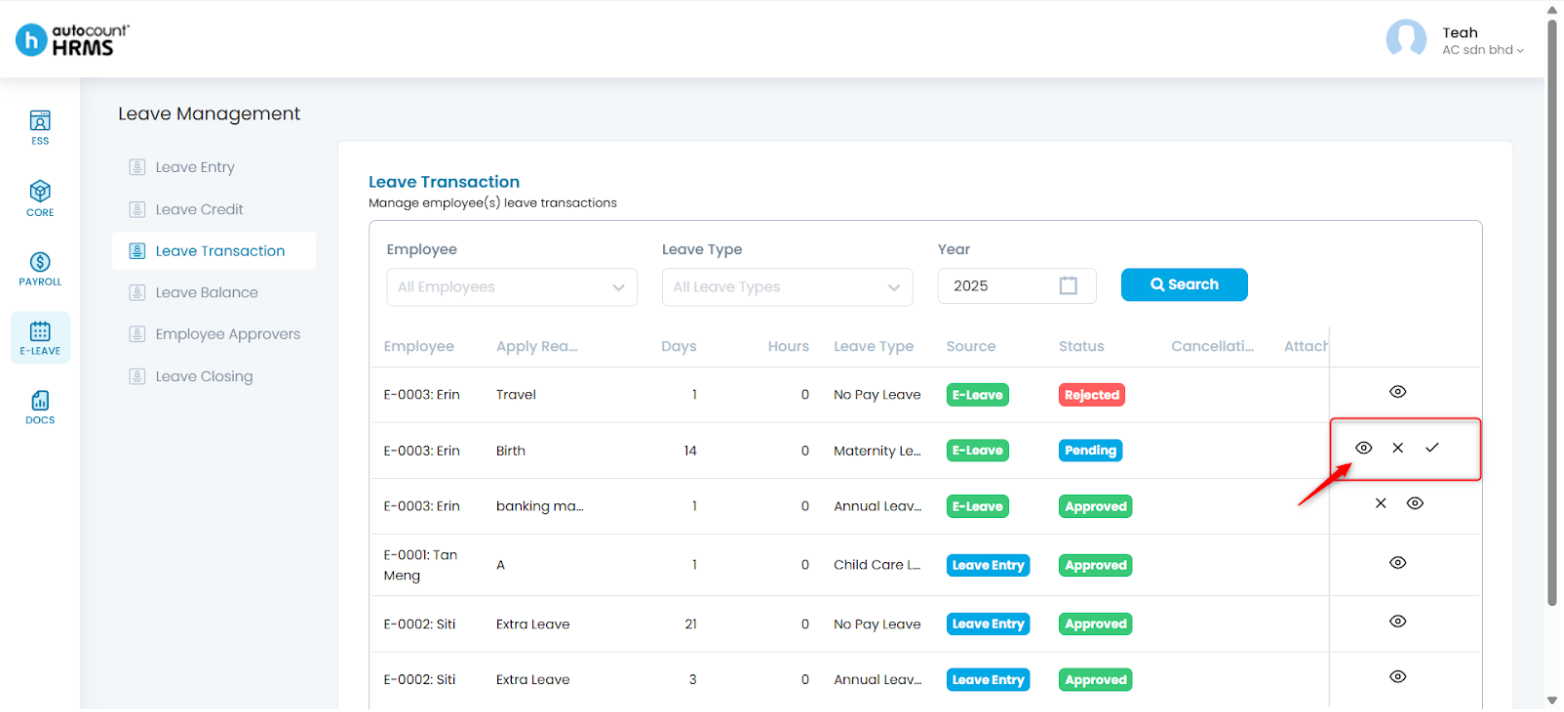
2. The leave request will be approved.
Steps to Reject a Leave Request:
1. Click the Cross icon next to the pending leave request.
2. Click Reject to confirm.

3. The leave request will be rejected.

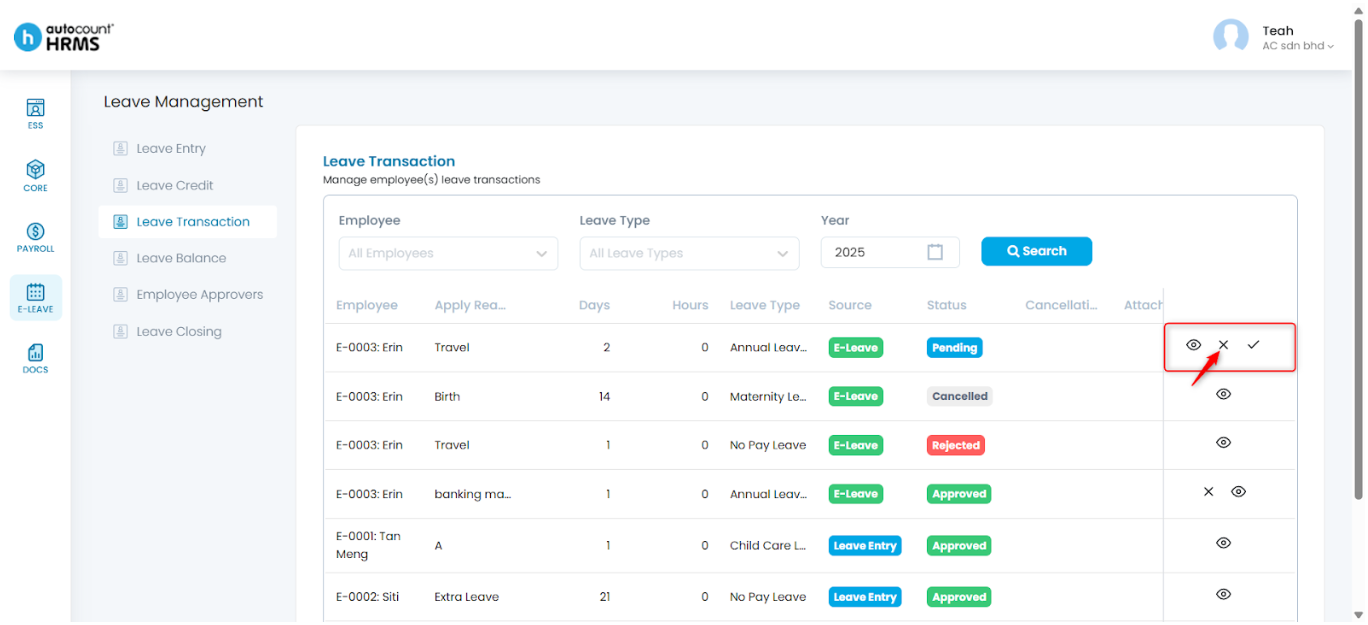
Steps to Cancel an Approved Leave Request:
1. Click the Cross icon beside the approved leave entry.

2. Tick the checkbox(es) for the Leave Dates you wish to cancel. Enter a cancellation reason (optional), then click Cancel Selected Leave(s).

3. Click Yes to confirm.

4. The leave request will be cancelled.

Note: Leave entries applied via Leave Entry can be cancelled directly from the Deduct Leave page by clicking the trash bin icon next to the record. (See Leave Entry)
Written by: Teah Rui Harn (20251209)
Reviewed by: Tek Ee Lin (20251209)