Reports play a vital role in helping companies analyse performance, monitor HR activities, and make informed decisions. Reports in HRMS are generated automatically using data inserted and stored in the system.
Employers can customise report layouts, apply filters, and export reports to support operational and compliance needs. However, the underlying report data itself cannot be modified.
Steps to Generate a Report:
1. Go to Docs > Report.

2. From the Report panel on the left, search for and select the required report template.

3. Apply the relevant filters based on the selected report type:
- Start Date and End Date – Click the calendar icon to select the year, month, and/or date range. (Applicable for reports such as Detailed Employee, Summarized Employee, Adhoc Payroll Item)

- Period Selection – Click the calendar icon to select the required month and/or year. (Applicable for reports such as Detailed Employee Turnover, Summarized Employee Turnover, Bank Credit)

Tip: For filters requiring both month and year selection, click the header above the month list to change the year first, then select the month. The same applies to filters requiring date, month, and year.

iii. Item Selection – Tick the required item(s) from the dropdown list. (Applicable for reports such as Payroll Item, Leave Type, Leave Group)

4. Click Apply to generate and view the report data.

5. Click Advanced Filter to further refine report results. Configure the available options based on the selected report, then click Apply:
i. Filters
- Join Date / Resign Date – Tick the checkbox, then select the period using the calendar icon.
- Department / Employee / Process Type / Item Type / Leave Type –Tick the checkbox, then select from the dropdown list.

ii. Report Option (Available for selected reports only, such as Detailed Employee Turnover, Summarized Employee Turnover, Payroll Item, Leave Type, and Leave Group)
- Group By – Tick the box to group data by Project, Department, or Branch.
- Sort By –Tick the box to choose to sort data sequence by Employee Code or Employee Name.


The applied filter details will be displayed, and the report data will refresh accordingly.

Note: To edit an applied filter, click on the ticked checkbox to unlock it before modifying. Mandatory filters cannot be unticked, but you may change the selection.
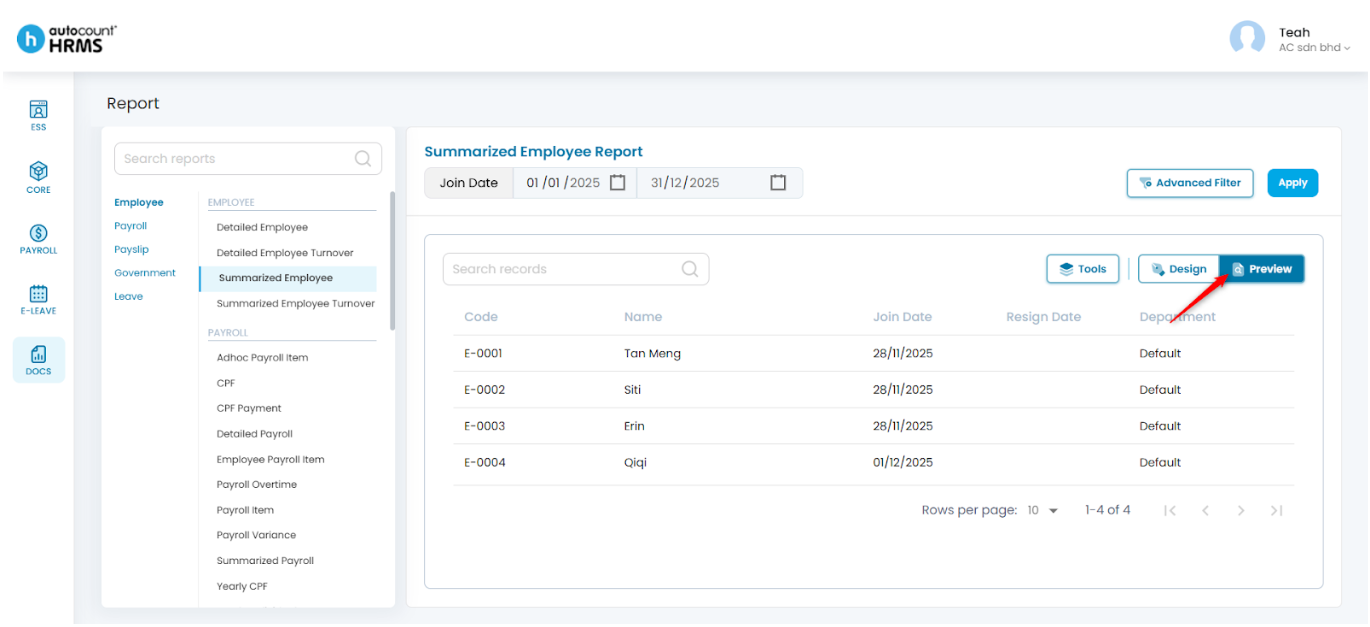
Steps to Preview and Export the Actual Report:
1. Click Preview to view the final report output.
2. To print or export the report:
- Click the Printer icon to print the entire report.
- Click the Print Page icon to print the current page only.
- Click the Export icon to select a file format (e.g. PDF, DOCX) and download the report. You may click the Settings icon in the right panel to adjust export options.


3. The exported file will be saved to your device’s local folder.

Tip: To search within a report, click the search icon. Enter the text, then tick Search. Tick the options below if needed:
- Match Case – Finds text with exact capitalisation.
- Match Whole Word Only – Finds only exact word matches, regardless of capitalisation.

Written by: Teah Rui Harn (20251216)
Reviewed by: Tek Ee Lin (20251217)